Create and Instance and connect via SSH proxy
In this example we will use OpenStack to create a key pair and launch an instance, once the instance is launched will will connect to it using SSH via a proxy host. We do not need to associate a public IP address with the instance for this type of access
Important steps before you begin
In this guide we will be creating a key pair and connecting to a cloud instance but before we begin we should allow pop ups from our OpenStack website by configuring the browser
when we create a key pair, chrome will automatically download the private key if we disable pop up blocker first.
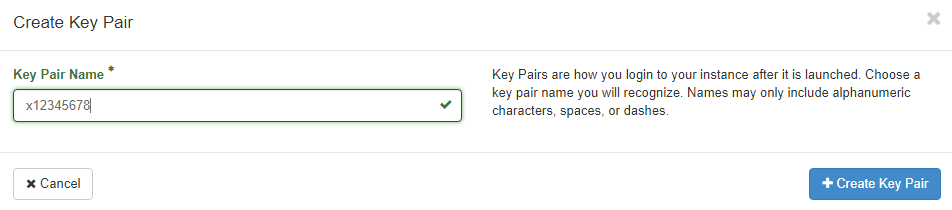
Step 1. Sign in to Openstack and create a key pair from your project menu

Give your key pair a name
About Public/Private key Cryptography
When you create a key pair OpenStack saves your public key in a database and gives you your private key. When launching an instance you choose which key to associate with the instance. When OpenStack builds the instance it configures SSH with your chosen public key as an "authorized key". You log in with the private key that matches. The easy way to think about this is, public keys are like pad locks which can only be opened by your private key
- Things to know
- OpenStack manages your public keys
- if you lose your private key you lose access to all servers associated with its' public key
- keep your private key secure
- you don't need to create a new key every time you launch an instance
- delete public keys from OpenStack if you no longer have the private key
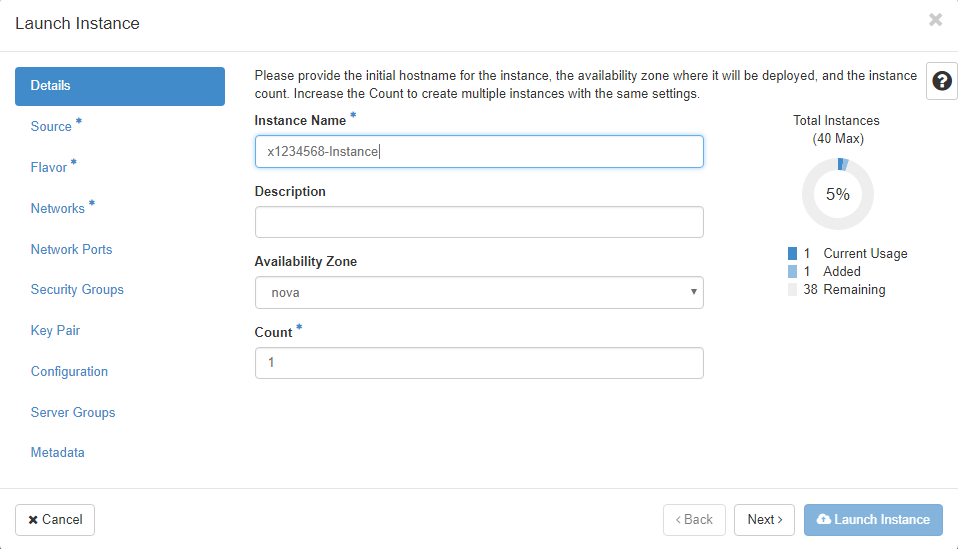
Step 2. Create an Instance
Now create an instance using OpenStack Horizon web interface, click Project >> Compute >> Instances and click the Launch Instance button
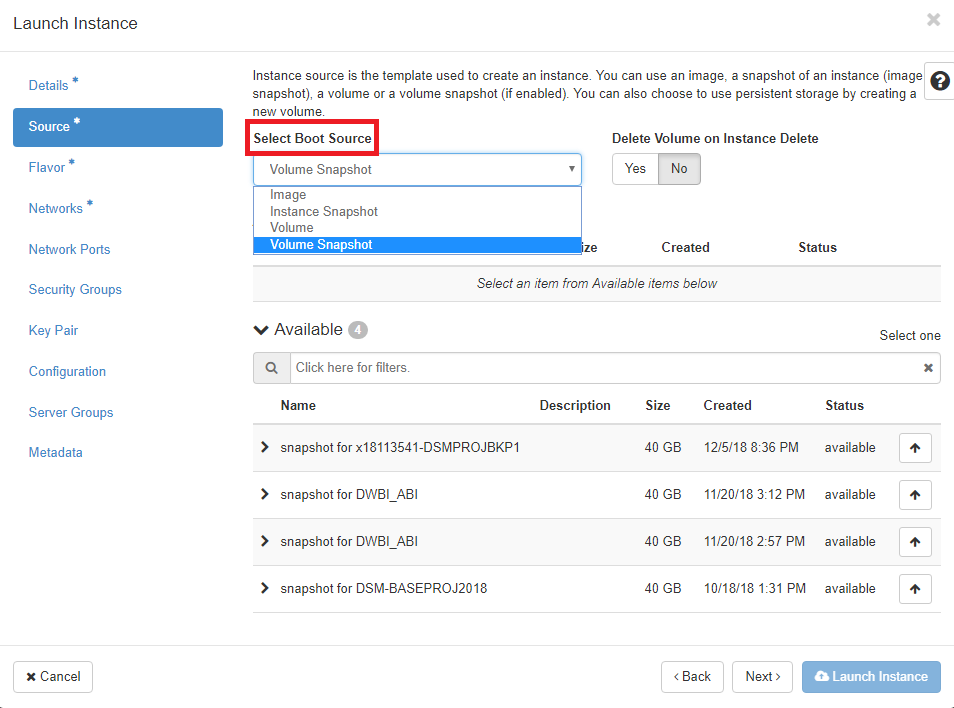
You can boot from an OS image such as Ubuntu or Windows, a snapshot of an instance, a volume (hard drive), or a snapshot of a volume
Select what flavour you want the server be and what network you would like to connect your instance to, then select which of your keys OpenStack should copy to the instance at build time. If you only have one key OpenStack will automatically associate that key with the instance, you should avoid having too many key pairs as it can become confusing as to which private key to use when signing in
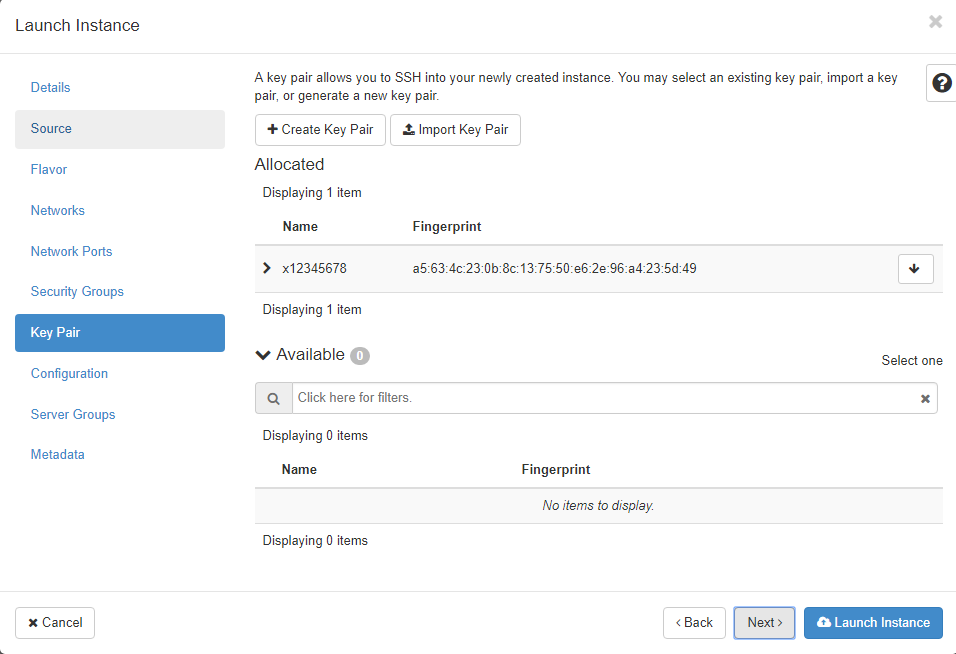
Complete the Launch Instance Dialog, you should now have a running instance with your key associated
Access your instance through the proxy host
There is a preconfigured Proxy host in your project called 'bastion'. your public key will be copied to this server automatically whenever you create one. The bastion host is connected to the public network and is also attached to the private router of your instances. To connect to your instance we will "proxy" or "jump" from the bastion host to your private server. There are multiple ways of doing this depending on what you have installed on your client. If you are running Windows it's recommended to have a bash shell installed from the Windows subsystem for Linux, git bash or CYGWIN you can also proxy connections using the Putty program but it's awkward as you need to convert PEM encoded keys to PPK
Open Git Bash, locate your private key from the Downloads folder and make sure that the key is read only. In Bash that means changing the mode of the file with the command
chmod 0600 x12345678.pem
Example 1. Using SSH one Liner
- you will need to know 3 things to complete this command
- The name of your private key (e.g. x12345678.pem)
- The Public IP address of the bastion server(e.g. 87.xxx.xxx.xxx)
- The Private IP address of your Server (e.g. 192.168.100.55)
ssh -i <private-key>.pem -o "ProxyCommand ssh -W %h:%p -i <private-key>.pem ubuntu@<bastion-public-ip>" ubuntu@<your-instance-ip>
From the example given above this would be:
ssh -i x12345678.pem -o "ProxyCommand ssh -W %h:%p -i x12345678.pem ubuntu@87.xxx.xxx.xxx" ubuntu@192.168.100.55
Example 2. Configuring SSH
The problem with Example 1 is that every time you need to log in, you have to look for the command and it's not very intuitive or easy to remember
A better approach would be to configure SSH to use the proxy host by default, we can then configure individual hosts or wild card subnets. For this example I will be using Ubuntu installed via the Windows Subsystem for Linux
Open Ubuntu from the start menu or from the run dialog, when you enter the shell you will be in /home/<username>
first copy your private key from the Windows Download folder into the Ubuntu file system, I copy keys into the home directory, the Windows filesystem can be accessed from the /mnt directory
sudo cp /mnt/c/Users/<username>/Downloads/<private-key.pem> .
The . means copy to this directory. Next we need to make the key file read only
sudo chmod 0600 <private-key.pem>
Now our key file is copied to the Ubuntu environment and is set with the correct read only file permissions.
We will use a text editor to modify the ssh configuration, the config file is in: /etc/ssh/ssh_config
Open the file in your text editor of choice, in this example I will be using vim
sudo vi /etc/ssh/ssh_config
with the file open, press i to enter into insert mode
place the cursor at the end of the comments section of the file and paste in the following, change to your key and IP address
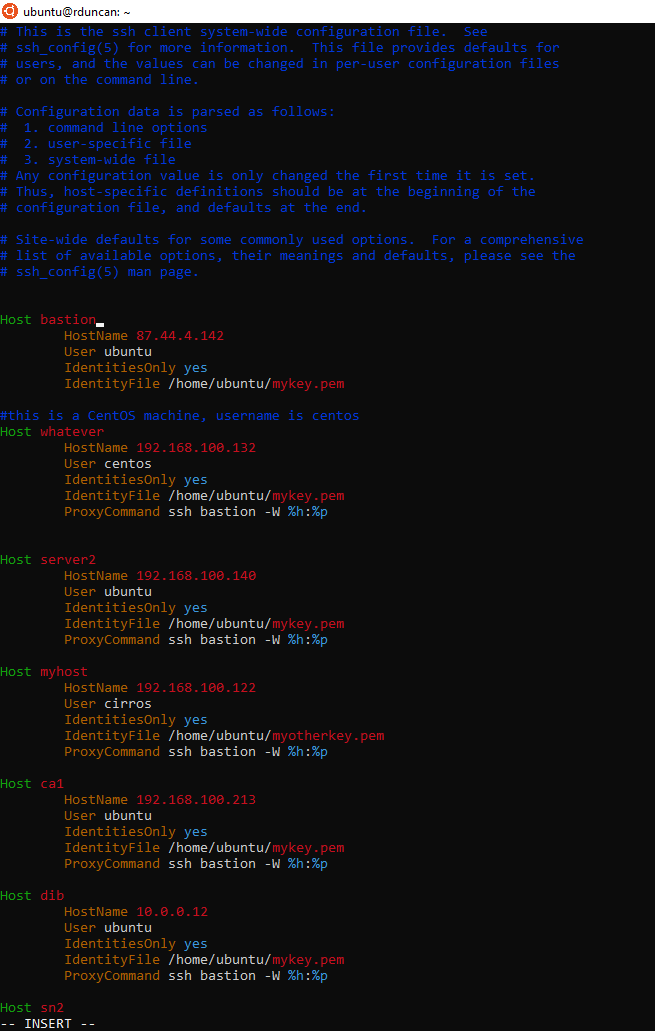
Host bastion
HostName 87.xxx.xxx.xxx
User ubuntu
IdentitiesOnly yes
IdentityFile /home/ubuntu/<private-key.pem>

Host myhost
HostName 192.168.100.140
User ubuntu
IdentitiesOnly yes
IdentityFile /home/ubuntu/<private-key.pem>
ProxyCommand ssh bastion -W %h:%p
To save the file, first exit insert mode by pressing esc
Then enter :
Save and quit by entering the command wq!
Example of ssh_config file.
Now whenever you open Ubuntu you can ssh to the name you gave the host and it will proxy through the bastion host
ssh myhost